Hummingbird Cinnamon Rolls: The Perfect Showstopper for Your Spring Brunch Spread
When I first started baking, the thought of making cinnamon rolls from scratch seemed utterly daunting. Sure, I could bake a decent loaf of bread, but I’d had my share of Cinnabon moments—those melt-in-your-mouth, cinnamon-swirled bites that make your eyes roll back in bliss. How on earth was I, a self-proclaimed kitchen newbie who struggled with simple tasks like writing a check, ever going to create such yeasty, sugary perfection?
Let me tell you, my first attempt wasn’t exactly promising. My buns were heavy, chewy, and lacked that luscious, gooey sweetness we all crave. But with time, practice, and a healthy dose of curiosity, I gained confidence, learned some tricks, and started to understand the essential steps to get it right. I no longer dive straight into the kitchen without a plan—I first take a moment to study the recipe, learn the techniques, and identify common pitfalls to avoid.
Today, I can confidently say that I’ve not only mastered the art of cinnamon rolls, but I also love experimenting with new variations for every occasion. I’m not bragging—after all, I still mess up the occasional check—just trying to remind those of you who fear the idea of homemade cinnamon buns that you can absolutely do this too!
The latest creation in my ever-growing collection of sweet bun recipes is the Hummingbird Cinnamon Roll. Inspired by the classic Hummingbird Cake—which typically features banana, pineapple, pecans, and cream cheese frosting—these cinnamon buns practically shout spring is here and it’s time for brunch!
Find the Recipe Here: Hummingbird Cinnamon Rolls
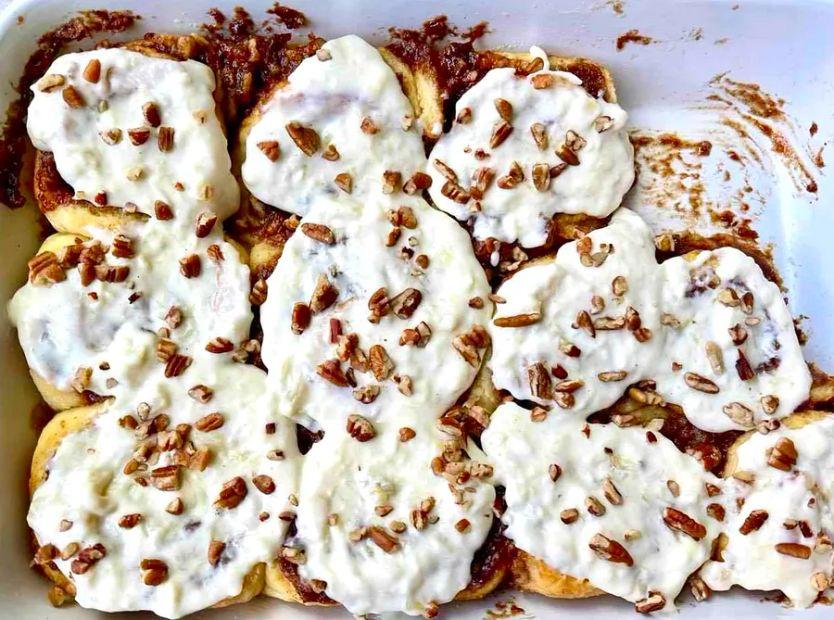
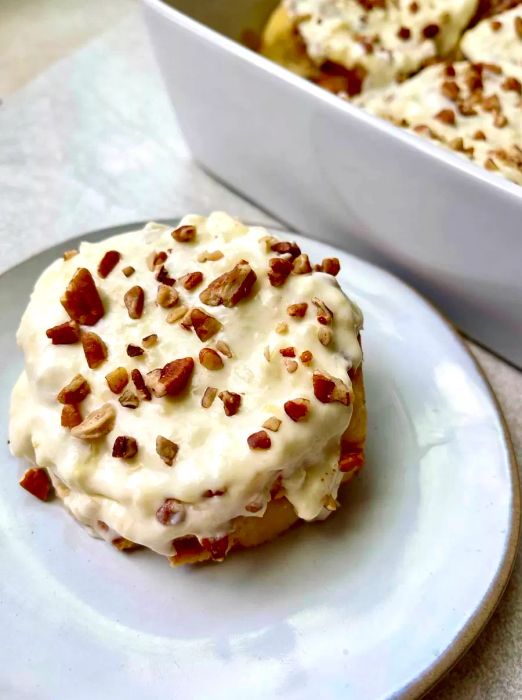
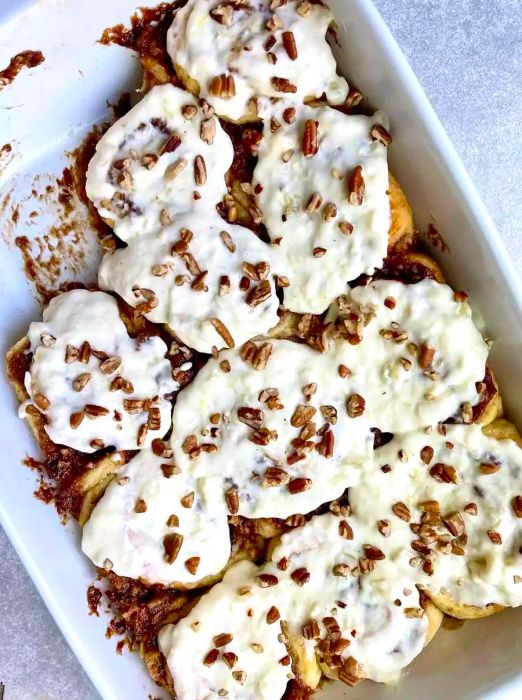
These cinnamon rolls feature a luscious banana-brown sugar filling, topped with a tangy pineapple-cream cheese frosting, and dotted with crunchy, toasted pecans. It’s a rich twist on the classic cinnamon roll, capturing all the flavors of a traditional Hummingbird Cake in a delightful breakfast-friendly format. Ideal for any spring gathering, I’m confident that both seasoned bakers and beginners can perfect this recipe on their first try. To help you get started, here are eight essential tips to follow:
1. Pay close attention to your yeast.
First, if you're digging out a packet of yeast from the back of your pantry, make sure to check its expiration date. While dry active yeast can last up to two years when stored properly, I’ve certainly made the mistake of thinking I bought a packet just recently, only to discover it was completely inactive.
Even if you're using fresh yeast that you trust, activation is still a crucial step. You'll need warm milk and a bit of sugar to wake up the yeast, and temperature is key here. Too cold, and the yeast won’t activate; too hot, and it could kill the yeast. The sweet spot is between 110 and 115°F—perfect for getting your yeast bubbling.
To get your milk to the right temperature, heat it gently on the stove over medium heat. It’s quicker than you might think to reach that range, which is why a cooking thermometer is super helpful. I hate recommending extra tools, but seriously, if you don’t already have one, it’s a small investment that makes a big difference—not just for buns but for many kitchen tasks.
2. Let your ingredients come to room temperature.
This specifically applies to your butter and egg yolks. Remember how you warmed your milk just right to keep your yeast happy? Yeast loves a warm environment, so allowing your cold ingredients to come to room temperature before adding them to your dough creates a better environment for the yeast. This results in a stronger rise in your final dough. Plus, having your butter at room temperature makes it easier to mix in, preventing overworking the dough. Softened butter is also key to creating the perfect cinnamon roll filling.
3. Don't overlook the power of instant potatoes.
Yep, that box of instant potato flakes you’ve got stashed away for quick sides? It’s a secret weapon in baking. I always add some to my sweet roll doughs because the potato flakes help retain moisture, resulting in buns that are extra tender and stay fresh for longer.
4. Mix well, but then know when to stop.
Sure, you need to mix your cinnamon roll dough until it pulls away from the sides of the bowl and forms a slightly sticky, smooth mass. But once you hit that point, stop mixing immediately. Overworking the dough will make it tough. You want to activate the gluten just enough to give the buns structure without making them too chewy.
5. Give your dough the time it needs to rise.
Most of us don't have a professional proofing box in our kitchens (if you do, I envy you), but you can still work with what you have. Your dough needs to rest in a warm, draft-free space. Create a calm, undisturbed environment for it. I often pop mine in the (off) oven since it’s a safe and cozy spot. If you have a sunny counter that’s out of the way of distractions like pets or people, that works just as well.
6. Use a ruler.
I’ve definitely looked at recipes that tell me to roll out dough to a certain size and thought, 'I can eyeball that.' And while I don’t want to underestimate your skills, trust me—your best bet is to measure. A ruler helps ensure you hit the right dimensions for your dough. Plus, using the straight edge to keep the edges of the dough straight as you roll will result in a perfect rectangle, not a lopsided shape that vaguely resembles one.
7. Roll tightly, pack tightly.
When it’s time to roll up your dough, aim to make the spiral as tight as possible. A snug roll makes it easier to slice clean rounds from the log (I prefer a serrated knife, but any sharp knife works) and gives your rolls more stability once baked.
I also recommend placing your rolls close together in a greased baking dish. Letting them 'hold hands' during the final rise and baking will help them puff up higher.
Personally, I love the gooey, soft texture that comes when cinnamon rolls bake together. But if you’re more into crispy edges and don’t mind sacrificing a little height, you can spread your rolls farther apart on a larger pan (like a rimmed baking sheet) with about one to two inches between each roll.
8. Don’t over-bake.
Honestly, it's better to have a bun that’s just a little under-baked than one that’s overdone and dry. Keep a close watch on your rolls toward the end of baking. The moment they turn a beautiful golden brown, take them out and let them cool for a bit before frosting them.


Evaluation :
5/5