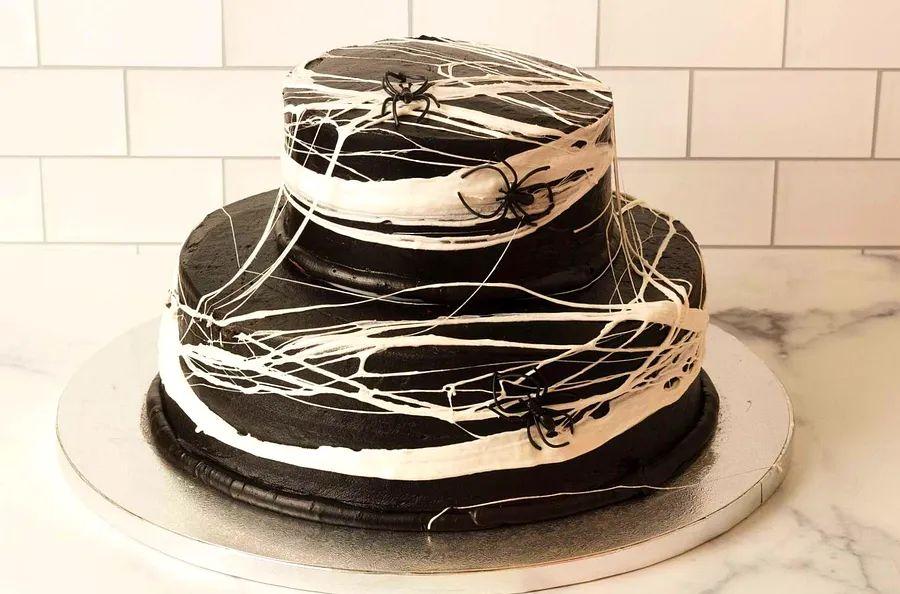
This Spooky Spiderweb Cake Will Give You the Creeps

This spiderweb cake strikes the perfect balance between eerie and delicious! No need for intricate weaving—this cake is sure to thrill your guests this Halloween. Keep reading to discover how to create a show-stopping spiderweb cake that’ll steal the spotlight at your party.
Before you dive in:
Let's talk cake choices
The possibilities are endless! Since the spiderweb design is such a visual treat, feel free to keep the cake simple on the inside with a classic yellow cake. Want to go all out? Try adding vibrant purple and orange layers or a festive flavor like pumpkin spice cake. As for the size, it's up to you! We chose a two-tier design with a smaller layer on top, but this spiderweb look will also shine on a Bundt cake, a 9x13 sheet cake, or a rectangular pan—no need for tiers. Round cakes work best for the web design, but square or rectangular pans can work too!
Now, let's talk frosting
We went with a black buttercream by simply adding black gel food coloring to a classic buttercream frosting. However, black food coloring can be tough to find and a bit messy. Another fantastic choice is dark chocolate frosting. You can use store-bought or make your own. For an even richer, darker color, try adding Dutch black cocoa powder, which offers both deep color and a rich flavor that’s almost as dark as food dye. Whichever frosting you choose, be sure to chill your cake in the fridge before starting the spiderweb decoration.
Now, let's talk marshmallows
Any store-bought marshmallows will work perfectly. I prefer to use the microwave for melting, but you can also melt them in a medium saucepan over low heat. The marshmallows are ready when they become sticky to the touch—test with a fork to check. If using the microwave, place them in a large microwave-safe bowl (they’ll puff up a lot) and heat in 10-second bursts until sticky. Be cautious as they can get very hot while melting. If they become too wet, let them cool for a minute and they should be sticky again.
Now, let's talk technique
This is where the fun (and mess) begins! You'll want to decide how messy you're willing to get. Using your gloved hands provides the most control over the spiderweb design. If you prefer a cleaner option, try using two forks instead. It’s much less messy and still creates a beautiful effect. Below, I’ll explain both techniques.
How to Create a Spooky Spiderweb Cake
What you'll need:
- A frosted and chilled cake.
- One 10.5 oz bag marshmallows (any size marshmallows will work)
- Medium-sized microwave-safe bowl
- Food-safe gloves or two forks (for pulling the marshmallows)
- Edible or toy spiders (we recommend edible if the cake is being served to little ones)
Step-by-step guide:
In a microwave-safe bowl, melt your marshmallows in 10-second bursts until they become sticky to the touch, or melt them on the stove in a saucepan until they're soft and cool enough to handle.
Stretching the marshmallows: hand technique

If you're using your hands, grab a handful of melted marshmallow and gently press it between your palms. Then, pull your hands apart, and the marshmallow will start forming a web-like pattern. Stretch the webbing across the cake until you’ve achieved the design you desire. If you're unsure, try practicing over the bowl first until you’re happy with how the webbing looks.
Stretching the marshmallows: fork technique

Take your two forks and dip them into the melted marshmallow. Hold the forks parallel to each other and press them together. Then, gently pull them apart, allowing the marshmallow to stretch into stringy strands that naturally form a web-like pattern. Continue dragging these marshmallow strings across the cake to build the spiderweb design.

Next, add some spooky touches with edible or toy spiders. These Spider Cookies or Edible Spiders would look adorable atop your cake. If you're using toy spiders, be sure to wash them first and place a small piece of plastic wrap underneath any part that will touch the marshmallow. Always prioritize food safety!
If you skip the plastic wrap underneath each spider, keep in mind that the toy spiders may stick to the marshmallow, pulling it off the cake along with the icing when you remove them. It’s best to slice the cake first, then take the spiders off before serving.
Pro tip: To make slicing through the marshmallow easier, run your cake knife under hot water before cutting.
Now, dive in and let your taste buds get caught in the delicious web of your spooky spiderweb cake!

1

2

3

4

5
Evaluation :
5/5