Tips for Photographing the Northern Lights with Your Smartphone
I had the fortune of witnessing the elusive northern lights during a special delivery flight, Singapore Airlines' inaugural 787-10 Dreamliner delivery from Charleston, South Carolina, to Osaka, Japan, and finally to Changi Airport.
As our flight neared Alaska, passengers on the right side were rewarded with a stunning spectacle, which — after considerable effort — I was able to capture clearly with my point-and-shoot camera.
In that moment, I vowed to see the northern lights from the ground — not far from our Dreamliner's route — in the heart of Alaska. That promise became reality in 2019 when I journeyed to the remarkably remote camp of Coldfoot, Alaska, along the famous Dalton Highway.
Taking photos of the northern lights
Many of the stunning images you've likely encountered of the northern lights have been captured using long exposure techniques.
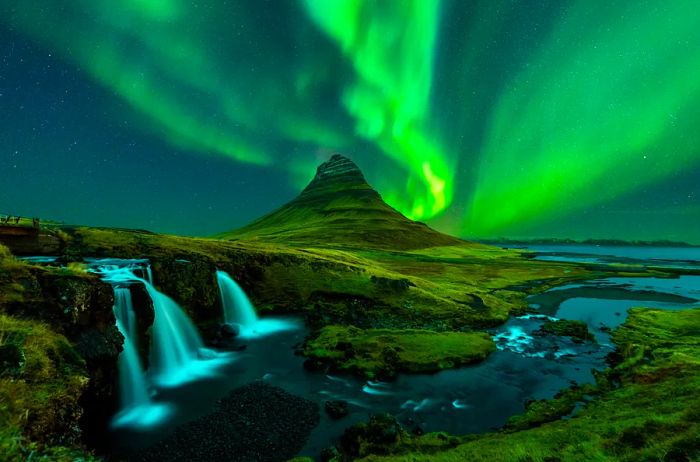 Northern lights illuminating Mount Kirkjufell in Iceland. SUTTIPONG SUTIRATANACHAI/GETTY IMAGES
Since the lights can be quite dim, especially compared to daytime subjects, photographers typically use shutter speeds of one second or longer. This means the lights may not appear as vivid in person, but on a clear night, they look absolutely breathtaking in photographs.
If you're using a proper camera, a tripod is generally essential — unless you have extraordinarily steady hands, which is quite difficult. If you're part of an aurora tour, your guide may provide a tripod, but it's wise to confirm beforehand; arriving unprepared could result in blurry photos. I also suggest bringing a flashlight to assist with focusing (more on that below).
However, I believe there's a significantly better option available.
The latest smartphone models excel at capturing stunning photographs in low light. In 2019, I managed to take some remarkable shots using just a handheld iPhone 11 Pro Max, and since then, even more advanced models and technologies have been released.
I’ll focus on Apple’s night mode here, as that’s what I used, but other recent models have similar features. Keep in mind that the process might vary slightly with newer devices, although the underlying concepts are likely the same:
- Choose your frame carefully — think about incorporating mountains, trees, cabins, and other elements to add depth and interest to your photos.
- Launch the native camera app and ensure proper focus — briefly illuminate a tree or object with a strong flashlight if your phone struggles to focus automatically.
- Make sure night mode is activated — when using the 1x lens in "photo" mode on the iPhone 11 during this time, an indicator will show at the top left corner; other smartphones might have a dedicated "night" shooting mode.
- Take plenty of shots — the aurora is dynamic and changes rapidly, so don’t hesitate to click away!
- Check your photos every few shots to ensure you're satisfied with the focus, exposure, and other settings.
If everything goes well, you should end up with images that resemble this:
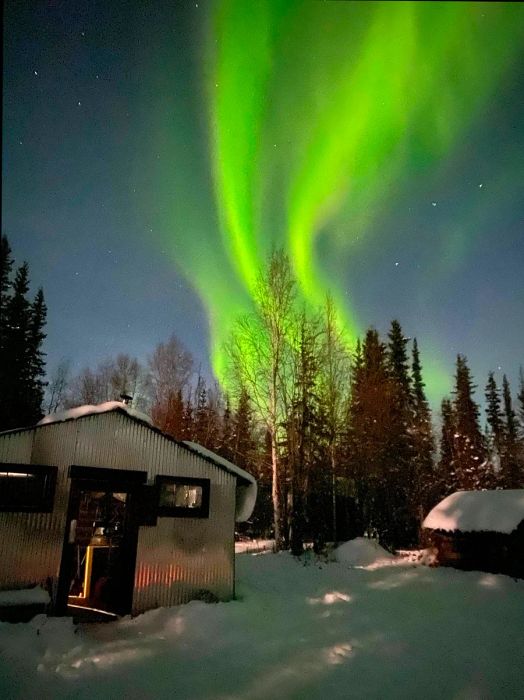 Photo by Zach Honig/Dinogo.
Editing Northern Lights Photos
You might observe that the image above appears somewhat lackluster compared to the polished version at the top. While it's certainly possible to share an image directly from your phone, enhancing your shot with some tweaks on your smartphone can really make it stand out, as I did here:
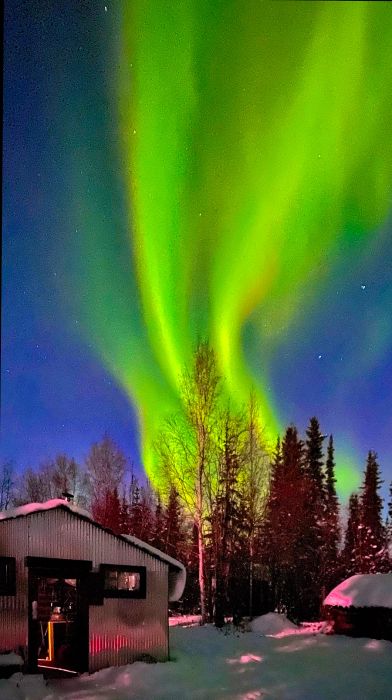 Photo by Zach Honig/Dinogo.
For specifically enhancing northern lights photography, I suggest the following adjustments.
- Adjust exposure as needed — I didn’t modify anything here.
- Lower the highlights to reveal more detail in the northern lights — I adjusted to the maximum range (-100).
- Raise shadow levels to enhance detail in other parts of your image — I increased this by +18.
- Boost vibrance — I added 51 to this image.
- Decrease warmth — this is a personal preference, but I found the image looked much better with a warmth setting of -13.
- Tweak the tint — I increased this by 94.
- Enhance sharpness and definition, if needed — I raised these values to 20 and 91, respectively.
- Correct vertical or horizontal perspective to align trees properly (this step can be a bit tricky, so if you're unsure how to do it on your smartphone, feel free to skip it).
The amount of editing you do will depend on the image and your personal taste, of course — darker auroras might require a bit more effort than their brighter counterparts. If you plan to share on your Instagram Story, be sure to crop the image to a 9:16 aspect ratio within your photo app for optimal sharpness.
How to Locate the Northern Lights
Generally, your best chance of witnessing the northern lights is to venture above the Arctic Circle, including areas in Alaska and Scandinavia. However, there are also opportunities to see the aurora further south, including in Iceland and occasionally — like this weekend — even in the contiguous United States.
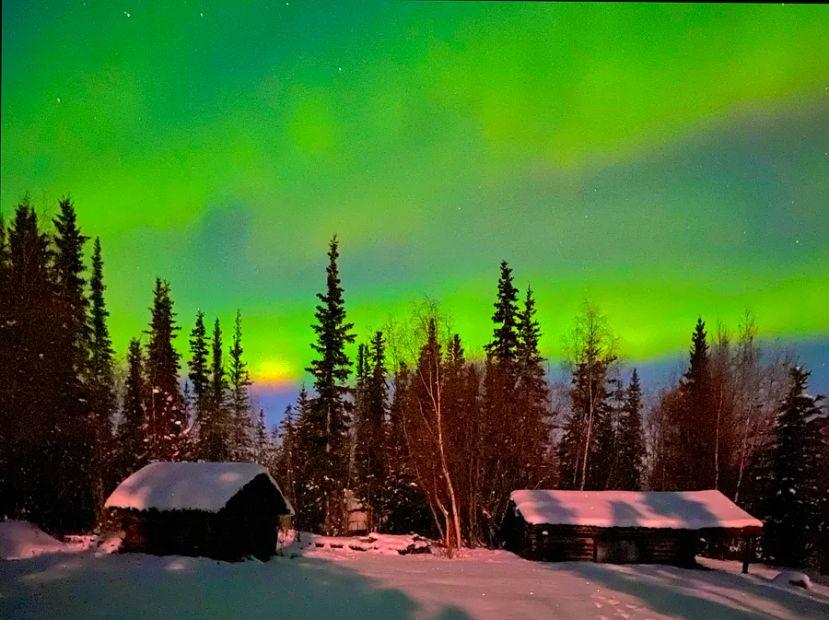
During my aurora-hunting adventure, I decided to journey deep into Alaska, just a few miles past Coldfoot, a small truck stop, to the tiny settlement of Wiseman. With about 10 residents, Wiseman consists mainly of a few log cabins, but its location directly under the auroral oval allows for breathtaking displays across much of the sky on clear nights.
Interestingly, my visit aligned with predicted periods of low auroral activity, but this primarily impacts the visibility distance of the northern lights — the display was quite vivid right beneath me. The full moon had minimal effect — in fact, I found it beneficial as it illuminated the nearby mountains and cabins beautifully.
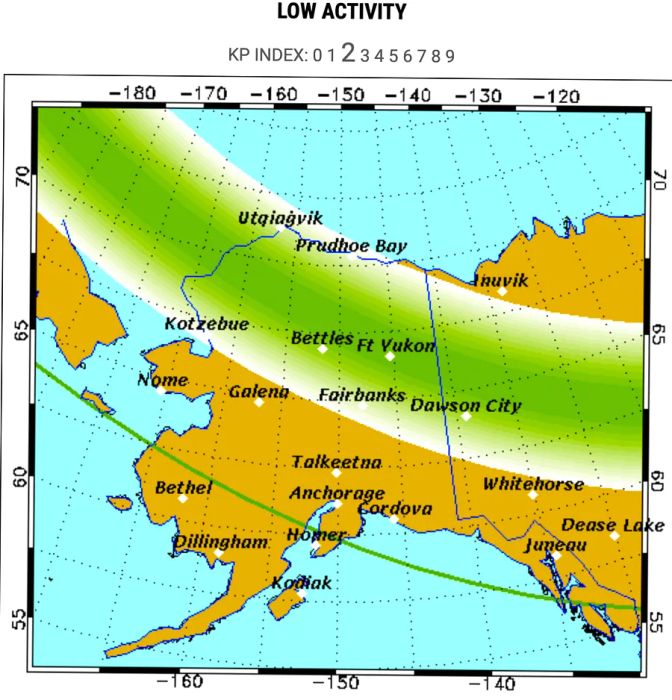 Image courtesy of the University of Alaska Fairbanks.
The best time to view the northern lights varies based on your location and timing — during my October trip to Wiseman, I was advised that the peak viewing window would be between midnight and 3 a.m., so be prepared for a very long day, possibly punctuated by a post-dinner nap.
While my October night at 5 degrees Fahrenheit was significantly milder than the frigid winter months, when temperatures can plummet to 40 below, your chances of seeing the lights improve later in the season, including in spring when temperatures start to rise again.
Keep in mind, though, that there's no guarantee you'll witness any activity, even on a clear night — I missed out on my second night as clouds and snow rolled in after sunset, despite a clear forecast. However, the one factor you can manage is your camera, and if you’re investing in a trip to see the aurora, I highly recommend getting the latest smartphone as well.
You can also use apps like My Aurora Forecast & Alerts that provide notifications to let you know when it’s a good time to head outside and look up at the sky.
Final Thoughts
While it’s exceptionally rare for the northern lights to extend as far south as Texas, Florida, or even Mexico, this provides a unique opportunity for many to experience them without needing to venture north for this stunning natural display. Fortunately, if you follow some of these tips, your smartphone can effectively capture the moment.
If you miss this opportunity, don’t fret — we’re predicted to enter a prolonged period of elevated northern lights activity, so if you feel inspired, consider planning a trip later this year specifically to experience it.

1

2

3

4

5
Evaluation :
5/5