Perfect Pot Stickers

Whether enjoyed as a starter or a hearty main course, pot stickers are always a crowd-pleaser. Chef John's version takes it up a notch, being fried, steamed, and then fried again to create a crispy base with a juicy, flavorful filling.
This is a recipe you'll want to save—these homemade pot stickers are so good, you'll be making them time and time again.
What Exactly Are Pot Stickers?
Pot stickers are a variety of dumpling that are thought to have originated in China. Traditionally filled with ground pork and cabbage, they can also be made with other ingredients. These dumplings are usually pan-fried and steamed, giving them a tender filling and a crispy exterior.
How to Make Pot Stickers
Below is the complete recipe, but here's a quick rundown of the steps you'll follow:
- Prepare the Filling: Mix ground pork, green onions, garlic, ginger, soy sauce, sesame oil, cayenne, and cabbage in a mixing bowl. Once combined, refrigerate the mixture until ready to use.
- Prepare the Dough: Gradually add hot water to flour and kosher salt, stirring until a dough forms. Knead the dough until it's smooth and elastic, then cover it in plastic wrap and let it rest for 30 minutes.
- Shape the Pot Sticker Wrappers: Divide the dough into four equal portions (keep the remaining dough covered). Roll each portion into a log, then cut it into six pieces. Roll each piece into a wrapper. Repeat until all dough is used.
- Fill the Pot Stickers: Place a small spoonful of the pork mixture in the center of each wrapper. Wet the edges of the wrapper, then fold and pinch them together. Tap the pot sticker gently on the surface to flatten, then curve slightly so it can stand upright.
- Make the Dipping Sauce: In a bowl, combine rice vinegar and soy sauce. Set aside for serving.
- Cook the Pot Stickers: Pan-fry the pot stickers until golden brown, then add water and steam for 3 minutes. Once the water evaporates, continue to pan-fry until the pot stickers are crispy.
How to Cook Pot Stickers
Chef John's method for cooking pot stickers is one of our favorites. To get that perfect crunch and tenderness, start by pan-frying the pot stickers in oil until the bottoms are golden. Then, add water to the pan and cover it to steam for three minutes. Once the water has evaporated, uncover and let the pot stickers fry again until the bottoms are crisp and golden.
Dipping Sauce for Pot Stickers
Chef John's pot sticker dipping sauce is simple but flavorful. Just mix soy sauce and rice vinegar in a bowl. For an extra kick, you can enhance the sauce with hot sauce, minced garlic, chopped green onions, or fresh ginger.
How to Store Pot Stickers
Store any leftover pot stickers in an airtight container in the fridge for up to four days. To reheat, simply microwave until warm. For that crispy texture, reheat in the microwave first, then pan-fry in oil until the bottoms are crispy again.
How to Freeze Pot Stickers
Uncooked pot stickers freeze beautifully. Simply prepare them up to the point of assembly, but don't cook them. Lay the pot stickers out on a baking sheet and freeze for several hours, or until they are solid. Once frozen, transfer them to a zip-top freezer bag and store for up to three months.
When you're ready to enjoy your pot stickers, there's no need to thaw them. Just follow the original cooking instructions, but keep in mind you might need to add a couple more minutes to the cook time to account for them being frozen.
Dinogo Community Tips and Praise
"My 17-year-old daughter said: 'Better than restaurant quality!' says Denise Perchall. "I used store-bought wonton wrappers instead of making the dough from scratch. Even with the pre-made wrappers, it took me a bit longer to prepare, but the end result was totally worth it."
"Chef John really hit the mark with this one. The video is fantastic—extremely helpful," says Scott Jennings. "It took me a while to prep, but I’ll definitely make these again and get faster each time. It took me about 90 minutes from start to finish, and my family devoured them in 90 seconds—so delicious, the sauce was perfect too!"
"Incredibly tasty, just like something you'd get at a restaurant," praises Greta K. "I would absolutely recommend this recipe, especially as an appetizer for a dinner party. The assembly does take some time, but it’s enjoyable and to be expected when making something from scratch. 5 stars!"
Editorial contributions by Bailey Fink
Ingredients
Filling:
-
1 pound ground pork
-
4 cloves minced garlic
-
½ cup finely chopped green onions
-
3 tablespoons very finely minced fresh ginger
-
2 tablespoons soy sauce
-
1 teaspoon soy sauce
-
1 teaspoon sesame oil
-
1 pinch cayenne pepper
-
1 ½ cups finely chopped green cabbage
Dough:
-
2 ½ cups all-purpose flour, or more as needed
-
¾ teaspoon kosher salt
-
1 cup hot water, about 130 - 150 F (55-65 C)
Dipping Sauce:
-
¼ cup seasoned rice vinegar
-
¼ cup soy sauce
For Frying:
-
6 tablespoons vegetable oil for frying, or as needed - divided
-
8 tablespoons water for steaming, divided
Directions
In a mixing bowl, combine ground pork, green onions, garlic, ginger, 2 tablespoons plus 1 teaspoon of soy sauce, sesame oil, and a pinch of cayenne. Add the chopped green cabbage on top. Use a fork to mix everything together thoroughly, then press down lightly. Cover with plastic wrap and refrigerate for about an hour to chill.
In a mixing bowl, combine 2 ½ cups of flour and kosher salt. Gradually add hot water, stirring with a wooden spoon until the dough begins to form and becomes shaggy. Dust your hands with flour and transfer the dough to a clean surface. Knead for 3 to 5 minutes until the dough is smooth and elastic. If it’s too sticky, sprinkle a bit more flour, up to an additional ½ cup, and continue kneading. Once smooth, wrap the dough ball in plastic wrap and let it rest for about 30 minutes.
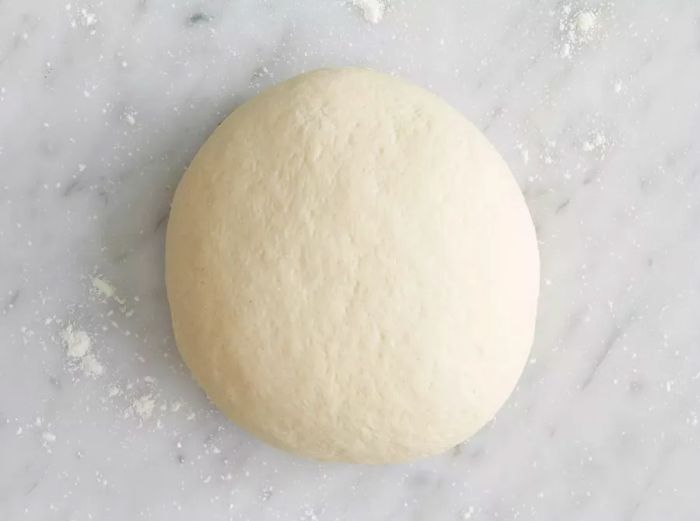
Dotdash Meredith Food Studios
After the dough has rested, divide it into 4 equal portions. Keep 3 pieces covered with a dish towel as you work with the first. Roll it into a log about the thickness of your thumb, roughly ¾ inch wide. Slice the log into 6 even pieces. Roll each piece into a thin, 3 ½-inch circle on a floured surface to form the pot sticker wrappers. Repeat the process with the remaining dough.
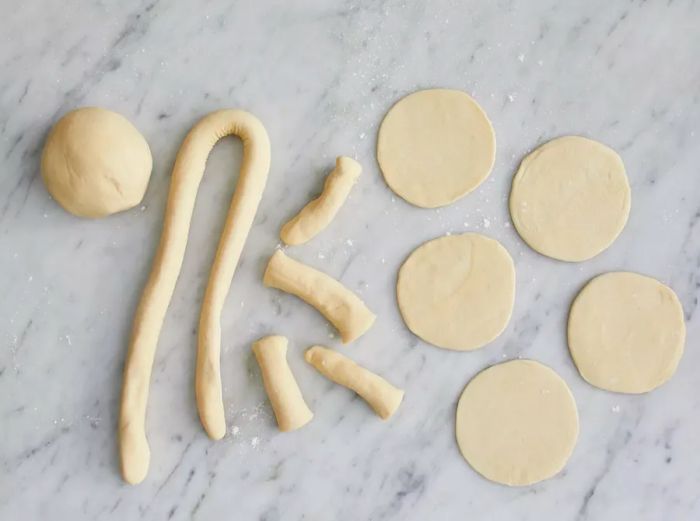
Dotdash Meredith Food Studios
Dampen the edges of a wrapper with a wet finger. Place a small spoonful of the seasoned pork mixture in the center of the wrapper. Fold up the two sides and pinch them together at the center. Then, pinch the remaining edges, creating pleats on one side. Gently tap the pot sticker on the work surface to flatten the bottom slightly, and form a gentle curve so it can stand upright in the pan. Transfer to a floured plate and repeat with the rest of the dough and filling.

Dotdash Meredith Food Studios
Heat oil in a skillet over medium-high heat. Add about 6 or 7 pot stickers, flat side down, into the hot oil. Cook for about 2 minutes until the bottoms are golden brown. Pour in water and quickly cover the pan, allowing the pot stickers to steam for 3 minutes. Once the water has evaporated, uncover and lower the heat to medium. Continue cooking for another 1 to 2 minutes until the bottoms are crispy and browned. Transfer to a warm serving dish and repeat with the remaining pot stickers. Serve with dipping sauce.
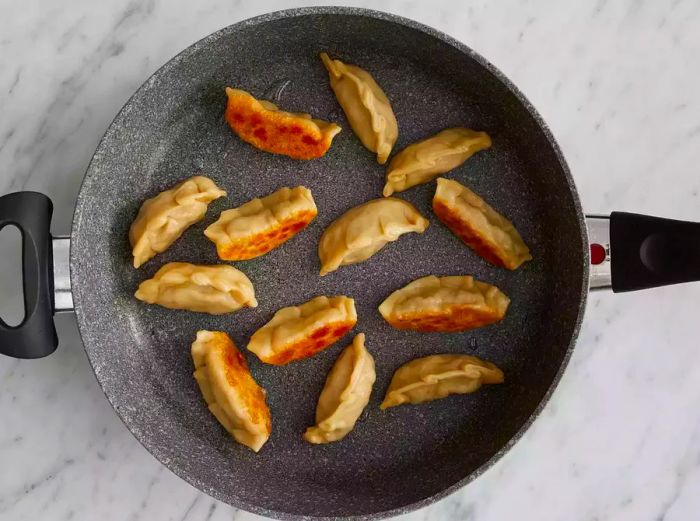
Dotdash Meredith Food Studios
Serve immediately while hot and enjoy!

Dotdash Meredith Food Studios
Nutritional Information (per serving)
| 439 | Calories |
| 19g | Fat |
| 46g | Carbs |
| 20g | Protein |
| Nutrition Facts | |
|---|---|
| Servings Per Recipe 6 | |
| Calories 439 | |
| % Daily Value * | |
| Total Fat 19g | 24% |
| Saturated Fat 6g | 32% |
| Cholesterol 55mg | 18% |
| Sodium 1453mg | 63% |
| Total Carbohydrate 46g | 17% |
| Dietary Fiber 2g | 9% |
| Total Sugars 4g | |
| Protein 20g | 40% |
| Vitamin C 11mg | 12% |
| Calcium 42mg | 3% |
| Iron 4mg | 21% |
| Potassium 391mg | 8% |
* Percent Daily Values are based on a 2,000 calorie diet. Your daily values may be higher or lower depending on your calorie needs.
** Nutrient information is not available for all ingredients. Amount is based on available nutrient data.
(-) Information is not currently available for this nutrient. If you are following a medically restrictive diet, please consult your doctor or registered dietitian before preparing this recipe for personal consumption.


Evaluation :
5/5